
I first learned about apple cider vinegar and its’ benefits a couple of years ago after having an allergic reaction to a bee sting. Sounds confusing, right? After the sting, my arm swelled up so I ended up going to the ER. After refusing the steroid treatment, they suggested a stronger combo of benadryl than I had been using and pepcid. I questioned the combo especially since pepcid is known as a an antacid. Apparently pepcid is also a histamine blocker and it works on different histamines than benadryl. I didn’t really understand the science but since I didn’t want to take the steroids and I needed to do something, I figured it was a better option. The drug combo made me tired but it worked on the swelling almost immediately. A side effect of the pepcid was that I got heartburn. How did I get heartburn from an antacid you wonder? My Chiropractor friend explained that the pepcid stopped my natural stomach acid so my body responded by producing more. He suggested taking a shot of apple cider vinegar to help. Wow! It worked almost instantly. It is now my “medicine” of choice for heartburn.
I heard more about the vinegar when I saw a recipe for coughs which include 1 tablespoon each of raw honey, fresh lemon juice and raw apple cider vinegar. RAW apple cider vinegar? I had no idea what that even meant. At the time I was making homemade raw sauerkraut and reading a lot about fermented foods so it wasn’t much of a stretch when I learned the raw vinegar is just not heated or pasteurized so it has beneficial probiotics in it naturally. I am all about natural and probiotics. I found a recipe online and made my first batch. The downside is that it takes 3 plus months in the beginning. The plus side is you just need apple scraps, sugar and water. That time goes fast and once you have made your own, you will never want the processed vinegar again.
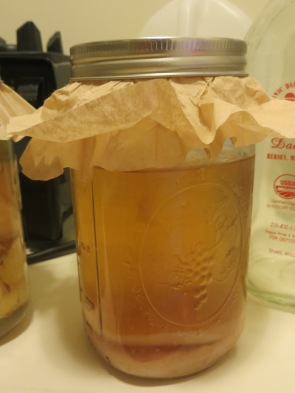
The first batch I made called for cutting up pieces of apple including the core and then making a simple syrup. I use raw sugar and make a one to one ratio for the syrup. One cup of boiling water to one cup of syrup. I use a quart mason jar and fill it with apple pieces. I have used scraps from pie making, whole fresh apples, and apples that are starting to go past their prime, that my kids don’t really want to eat. My son’s teacher used cider making scraps. Pour the cooled syrup over the the apples and fill the jar with filtered water. You need the sugar to aid in the fermenting. The fermenting process needs air to aid it so I use a coffee filter held in place with the jar lid. You can use cheesecloth, a thin paper towel and a rubber band to hold it in place. You want to keep bugs out but let the air in.


Keep the apples in a cool dark place that will get good air flow and check on them regularly. At first I kept my apples in a kitchen cabinet, but now I have a pantry so I keep them in there. The first batch I made, I checked ever day constantly pushing the apples below the liquid to prevent mold. Now, I tend to neglect them for days sometimes and it is fine. After about two weeks, strain the liquid, dispose of the apples and return the vinegar to the jar. You have the beginnings of vinegar and now all you need is time.
Check the vinegar regularly. Again, with my first batch I did it daily, now I do it weekly. Stir the vinegar to help the air flow. You can start tasting it after a couple of months and it is “done” when you are happy with the flavor. You can then put your vinegar in an air tight container. It will continue to age but at a slower process since it isn’t exposed to the air. Now every time I make the vinegar I add a little of my previous batch to the apples as it helps them ferment faster. My current batch even has a good sized “mother” which is similar to a scoby used for kombuchu tea.

You can use any kind of apples you like and you can even mix and match them. It will change the flavor slightly of your vinegar. Apple cider vinegar has been touted for everything from stomach problems, to reducing inflammation, to aiding in wait loss, to helping with preventing illness and more. Good luck and happy fermenting!


